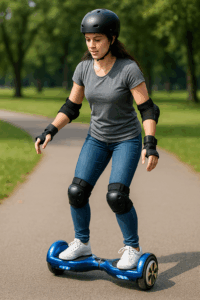
Congratulations on your hoverboard! To keep it running smoothly and safely, a little routine maintenance goes a long way. Hoverboards are relatively low-maintenance devices, but taking care of the battery, wheels, and sensors will ensure you get the best performance and longevity out of your self-balancing scooter. In this guide, we’ll cover hoverboard maintenance tips and specific battery care practices. From charging do’s and don’ts to cleaning and storing your board, we’ve got you covered.
By following these tips, you’ll reduce the risk of malfunctions, maintain optimal ride quality, and help prevent any safety issues related to battery or mechanical wear. Let’s dive in:
1. Proper Charging Habits
The battery is the lifeblood of your hoverboard, so caring for it is critical:
- Use the Right Charger: Always use the charger that came with your hoverboard or a manufacturer-approved replacement. Using an incorrect charger can risk overcharging or not charging properly. Check that the voltage and connector match if you ever replace the charger.
- Charge in a Safe Area: When charging, place the hoverboard on a hard, flat surface (like tile or concrete floor), away from flammable materials. Avoid charging on beds, sofas, or carpet. It’s rare for a problem to occur, especially if UL certified, but it’s best to be cautious.
- Don’t Overcharge: Hoverboards nowadays have overcharge protection, but it’s still wise not to leave it plugged in for excessively long periods once full. A typical charge takes 2-4 hours. Once the indicator shows a full charge (usually green light on charger), unplug it. Consistently overcharging (like leaving it plugged in overnight every night) can slightly reduce battery lifespan over time.
- Avoid Complete Drain: It’s not great for lithium-ion batteries to be fully drained to 0% frequently. Try to recharge when you get down to around 20%–25% battery if possible. If your hoverboard starts beeping due to low battery, finish your session and charge up.
- Let it Cool Before Charging: If you were riding aggressively or for a long time, the battery and internal components might be warm. It’s a good practice to let the hoverboard cool down for maybe 15-30 minutes after use before plugging it in. Charging a hot battery can stress it more.
- No Cold Charging: Similarly, if your hoverboard was stored in a very cold place (below 40°F / 5°C), let it come to room temperature before charging. Charging at freezing temperatures isn’t ideal for battery chemistry.
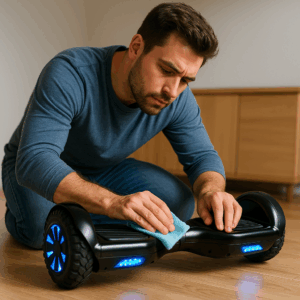
2. Regular Cleaning
Keeping your hoverboard clean not only makes it look good, it prevents debris from affecting the wheels or sensors:
- Wheels and Housings: After riding, especially outdoors, check the wheel wells and tires for any dirt, leaves, or pebbles. Use a soft brush or cloth to remove debris. For models with open wheels (you can see the tire), make sure no string or hair has gotten wrapped around the axle.
- Exterior Shell: Wipe down the hoverboard’s shell and footpads with a slightly damp cloth to remove dust or grime. Avoid excessive water – never hose it down or submerge it. If there are stubborn scuffs, a mild cleaner on a cloth can help (spray the cloth, not the board).
- Footpads: These can accumulate dirt from your shoes. Keeping them clean ensures good traction. Use a damp cloth; if they’re rubbery with grooves, an old toothbrush can get into the texture.
- Avoid Harsh Chemicals: Don’t use strong solvents or aerosol cleaners, as they might degrade the plastic or rubber parts. Gentle cleaning agents or just water with a tiny bit of dish soap work fine.
- Dry Before Storage: If your board did get splashed or you wiped it with a damp cloth, dry it off with a towel before putting it away or charging it. This prevents any moisture from seeping into crevices.
3. Tire and Wheel Maintenance
Depending on your hoverboard’s wheel type:
- Solid Rubber Wheels (most 6.5” and 8” boards): These don’t need inflation, but do check them for wear. Over many miles, the tread can wear down. If the wheel becomes very smooth and bald, you might lose traction. Replacement wheels can be installed in some models – check with the manufacturer if needed.
- Pneumatic (Air-filled) Tires: If your hoverboard has inflatable tires (common on 10” boards or some off-road ones), treat them like bike tires:
- Check the pressure periodically. Use a tire gauge and inflate to the recommended PSI (it should be listed in the manual or sometimes on the tire sidewall).
- Only use a hand pump or a pump with a very accurate low-pressure gauge. These tires are small, so they inflate quick – be careful not to overinflate and burst the tube.
- Inspect for punctures. If you notice one tire keeps losing air, you might have a small leak or puncture. Tubes can be patched or replaced similarly to bicycle inner tubes.
- Alignment and Spin: Occasionally, lift each wheel off the ground and spin it by hand. It should spin freely and fairly straight. If you hear grinding or it wobbles significantly, something could be off (like a misaligned motor wheel or debris stuck). In such a case, investigate further or contact support.
4. Recalibrating the Hoverboard
If your hoverboard starts to feel a bit off – for example, if one side seems to respond differently, or it doesn’t feel level when you’re going straight – it might need a recalibration:
- How to Recalibrate: While specifics can vary by model, a general method is:
- Turn off the hoverboard.
- Place it on a flat, level surface, making sure both sides are level and the footpads are perfectly horizontal (use a bubble level if you want to be precise).
- Hold down the power button for about 5-10 seconds (some models: up to 15 seconds) until you see some indicator (lights flash, or a beep).
- Release the power button and let the hoverboard sit level and idle. The lights may continue to blink for a bit.
- Press the power button again to turn it off.
- Turn it back on and test.
- When to Calibrate: Do it if you notice drifting (the board slowly turns or moves on its own when supposed to be stationary), or after a repair, or if you haven’t used it in a long time and it feels uneven. It’s not something you need to do often – only as needed.
- Post-Calib Testing: After recalibration, step on carefully for the first time to ensure it’s behaving correctly. It should feel stable and respond symmetrically now.
5. Battery Care for Longevity
Beyond charging habits, a few things can help extend your hoverboard’s battery life (in terms of lifespan of the battery pack):
- Don’t Store Fully Charged or Completely Dead: If you’re going to store the hoverboard for an extended time (weeks or months without use), aim to leave the battery about 50-60% charged, not 100% and not 0%. Lithium batteries last longest when stored at mid-charge. After storage, charge it up before use.
- Regular Use: Lithium-ion batteries like to be used. If you leave a hoverboard sitting for 6+ months without ever charging or using it, the battery could self-discharge to a level that’s too low, potentially rendering it unable to charge. If you’re not using it regularly, it’s good to top up the charge every couple of months at least.
- Avoid Extreme Temperatures: Don’t leave the hoverboard in a hot car trunk or outside in freezing weather. High heat can damage the battery (and electronics), and extreme cold will temporarily reduce its performance (and if a battery is frozen, charging it can be dangerous). Room temperature storage is ideal.
- Watch for Signs of Battery Wear: Over time (after hundreds of charge cycles), the battery capacity will start to decline – meaning shorter ride times. If you notice a drastic drop in range (and you’re sure your tires are inflated and nothing else is wrong), the battery might be aging. Quality hoverboard batteries can last a few years of moderate use. If needed, contact the manufacturer about a replacement battery pack – do not try to install incompatible batteries.
6. Inspect and Tighten
Vibrations from riding can sometimes loosen screws or other parts:
- Chassis Screws: Every so often, flip the hoverboard over and check the screws on the bottom casing. Gently tighten any that appear loose using the appropriate screwdriver or Allen key. Don’t overtighten to the point of cracking the plastic – just snug.
- Fender Covers and Bumpers: If your board has fender pieces or rubber bumpers, ensure they’re securely attached. These protect the wheels and your board from scratches. If they crack or fall off, replace if possible.
- Internal Connections: This is more advanced, but if you’re comfortable and if your warranty is expired, you could open the board’s bottom cover (with it turned off and unplugged) to peek inside for any obvious issues (loose wires, etc.). However, doing so might void warranties, so only do this if you know what you’re doing or if directed by customer support for troubleshooting.
- Noise Check: Listen while riding – if you start hearing any strange clicking, grinding, or buzzing that wasn’t there before, don’t ignore it. Investigate source of the noise. It could be a piece of debris stuck, a bearing going bad, or a motor issue. Addressing a minor issue can prevent a bigger failure later.
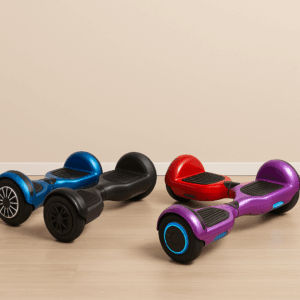
7. Storage Best Practices
When you’re done riding for the day or putting the hoverboard away for a season:
- Turn It Off: It might sound silly, but make sure the board is fully powered down when not in use. Some models auto-shut after a few minutes, but if yours doesn’t, leaving it on can drain the battery completely.
- Indoor Storage: Keep your hoverboard indoors in a dry environment. Garages are fine if they’re not too damp or cold/hot. Avoid damp basements or anywhere it might get wet or very dusty.
- Avoid Leaning on Charger Cable: When charging or storing, avoid scenarios where the board is dangling by the charger or the charger port is stressed (for example, don’t sit the hoverboard on a high shelf while plugged in and let it hang by the cord). The charge port can loosen or wires can fray if yanked.
- Don’t Stack Heavy Objects on It: The hoverboard’s shell and wheels can be warped or damaged if heavy pressure is applied for long periods. Store it in a way that nothing heavy will press on it. Some folks like to keep it in a carry bag – that’s a tidy solution for storage and protects it from dust.
8. Software/Firmware Updates
If your hoverboard has a Bluetooth app, occasionally the manufacturer might release firmware updates that improve performance or fix bugs:
- Check the App: If applicable, see if there’s a firmware update option. Read the release notes – sometimes updates can adjust how the board balances or improve battery management.
- Follow Instructions: When updating, ensure the hoverboard is fully charged (or at least over 50%) and keep it stationary. Don’t turn it off or use it during an update until it says complete.
- Only Official Updates: Only update through the official channels (the official app or support site). Don’t try to hack or mod the firmware unless you are an expert – the balancing algorithms are delicate; a bad firmware could make the board unsafe.
9. Know When to Seek Repairs
Basic maintenance is user-manageable, but certain things need professional attention:
- Water Damage: If your hoverboard accidentally went through substantial water (like fell in a puddle or got rained on heavily) and now acts erratically, do not use it. Water and electronics can be dangerous. Let it dry for several days completely. If it still malfunctions, contact a repair center. It may need internal cleaning or component replacement.
- Battery Replacement: When it’s time for a new battery, have it done through the manufacturer or an authorized service if possible. The battery is usually a plug-in module inside, but opening the board and handling lithium batteries requires care.
- Circuit/Motor Issues: If one wheel isn’t working (hoverboard spinning in circles), or it won’t balance at all (flashing lights indicating internal error), that could be a faulty sensor, motor, or circuit board. Those parts can be replaced, but unless you’re handy with electronics, it’s best done by professionals. Some hoverboard companies have repair services or can send you specific parts.
- Strange Burning Smell or Overheating: Stop using it. A burning smell or excessive heat from the board (battery or motherboard) is a serious red flag. Turn it off and disconnect the charger. A battery that overheats could be on the verge of failure. In such a case, contact the company immediately – do not attempt to ride it. Hoverboard fires are rare today, but not impossible if something internally has shorted or a battery cell failed.
Remember, safety first – when in doubt, get a professional opinion.
10. Tips to Prolong Overall Life
Finally, a few general tips to ensure your hoverboard has a long, happy life:
- Respect the Limits: Don’t consistently push the hoverboard beyond its design (like maxing out speed downhill, or carrying a rider above the weight limit, or doing jumps off curbs). Those actions can strain the motors, axles, and battery.
- Temperature Riding: If riding in cold weather, you’ll see reduced range – that’s normal. In very hot weather, give the board breaks so it doesn’t overheat the battery or electronics.
- Short Breaks on Long Rides: If you’re going on a long cruise, it’s not a bad idea to hop off every few miles for a couple of minutes to let things cool, especially on a hot day. The motors and battery will appreciate it.
- Keep Firmware Updated: As mentioned, sometimes updates can improve how the board handles charging and discharging which is good for battery health.
- Use It Gently if Loaning: If you let friends or kids use your hoverboard, make sure they know how to operate it and treat it well. One misuse could lead to damage you then have to fix.
With these maintenance and care steps, your hoverboard should remain a trusty ride for a long time. A well-cared-for hoverboard can last for years of regular use.
Conclusion
Hoverboards are a joy to ride, and taking a bit of time for maintenance will ensure your board stays safe and fun. To recap, hoverboard maintenance involves keeping it clean, checking the wheels and battery, charging properly, and doing occasional calibrations and inspections. Battery care is especially important – it not only preserves your board’s performance but also safety.
By treating your hoverboard kindly – storing it correctly, avoiding extreme conditions, and addressing issues promptly – you’ll prevent most common problems. Consider creating a simple checklist from this guide that you do maybe once a month (like: clean, inspect screws, tire pressure check, etc.) and before any long rides.
If you found this guide helpful, you might also benefit from our Common Hoverboard Problems and How to Fix Themarticle, which goes into troubleshooting mode for those times something isn’t working right. And always remember, a well-maintained hoverboard is a safer hoverboard, so you can ride with peace of mind.
Happy gliding, and take care of that hoverboard – it’s taking care of balancing you in return!
Anns is a contributor at HoverBoardRadix.com. We are committed to providing well-researched, accurate, and valuable content to our readers.